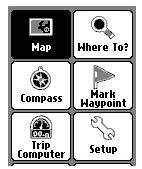
eTrex 10/20/30 track navigationThese notes are here because the routines needed are hidden in the menus of the GPS Indoors actionsYour first task is to load the track (name.gpx) into the GPS unit from your computer assuming you already have it stored on the computer and have already found it. First connect your GPS to your computer by the supplied USB cable. You should see your Garmin listed when you get the computer to display "My Computer" items. The track will appear as..... Outdoors actionsWhen you have copied the track to your GPS you can unplug it from the computer. Now, or later, you should take your GPS outside and set it going. When it has found the satellites and located your position, go through the actions below on the menu of the GPS. The menu you want looks rather like the image here...
You can use Track Manager....
Caution: Press joystick carefully to select "Go". Or you can use Where to?....
Caution: Press joystick carefully to select "Go". NotesThe initial screen will show the entire track, which is not useful for navigation as it is far too small. You will need to zoom in by using the second button down on the Left side of the GPS. (The top L button will zoom out). Once it is set up the screen should scroll to keep your current position in view. If you want the "Follow the needle" type of display, then use the "back" button to reach a menu screen with a "Compass" choice. On models without a compass, this choice will give you the "Follow the needle" display
|